Whereas the previous section provides a broad overview of Mechanica’s Order Manager features, capabilities and concepts, this section takes you step by step through the process of setting up and managing Parent and Child accounts. We urge you to go through the exercises as presented.
For the sake of clarity we’ll be working with a single system and three (3) instruments. But keep in mind that a single account can just as easily manage a program that trades dozens of systems on hundreds of instruments.
| 1 | Choose Symbol Manager from the Data menu. |
| 2 | Under Edit Page Properties of the the Pinnacle_Futures Data Page, set the Commissions field = 15. |
| 3 | Under the Data Page list, tag (check) the Pinnacle_Futures Data Page. |
| 4 | Click the Tag Symbols tab (bottom half of window), Press Unselect All, then tag the following Symbols: |
| n | AD_REV Australian Dollar |
| n | CD_REV Canadian Dollar |
| n | JY_REV Japanese Yen |
| 5 | Close the Symbol Manager. |
|
|
| 7 | Click the Add New button under Account Information. |
| 8 | The Trade Level (account balance) cell is selected automatically. Type: “500000000” ($500M), and press the Tab key. |
|
|
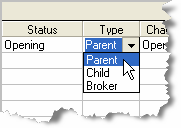
| 12 | Ignore the Change Status and Parent ID fields for the moment, and click the cell under the column heading Batch File. |
| 13 | From the Windows File Open dialog, select the file #8913_Default_OM_Batch.sig, located in the path |
..\Sample Rules\Signal Rules\
|
The SIG and SIZ files for which you wish to generate orders are always run by Order Manager from a batch file, so you must associate the desired batch file with the Parent Account, during the (account) setup process. To designate a SIG file as a batch file, simply place the word “batch” in the filename. |
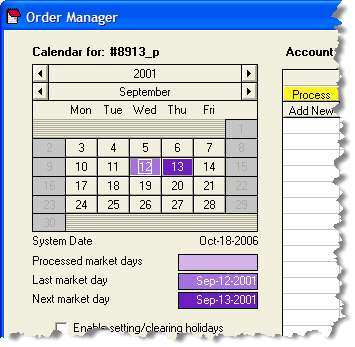
| • | This is what you should see: |

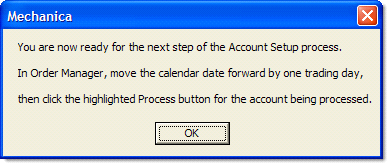
| • | The Process button appears yellow when the account is ready for its first day of processing, and the text message shown in yellow highlight above will appear at the bottom of the Order Manager screen. As it states, TWO trading days before live orders are needed, are required to set up a Parent account. |
Let’s pause for a moment and take a look at the logic of the system we’ll be using for this tutorial, and the types of orders we can expect it to generate. (Please leave OM open.)
| • | Follow along below, or open these files: |
n ..\Sample Rules\Signal Rules\#8913_Default_OM.sig
n ..\Sample Rules\Position Sizing Rules\#8913_Default_OM.siz
Resources
SYSTEM = 1 ' system ID
COL2 = MAX[H,89,0] + TICK[1] ' long entry
COL3 = MIN[L,13,0] - TICK[1] ' long exit
COL4 = MIN[L,89,0] - TICK[1] ' short entry
COL5 = MAX[H,13,0] + TICK[1] ' short exit
Trade Entry
BUYSTOP = COL2[1] ' long entry logic
SELLSTOP = COL4[1] ' short entry logic
Trade in Progress & Exit
SELLSTOP = COL3[1] ' long entry logic
BUYSTOP = COL5[1] ' long entry logic
Initial Size
STARTUPCASH = 5000000
STARTDATE = 19820101
NEWCONTRACTS = (TOTALEQUITY * .03) / NEWRISK
TRADEMEM[1] = NEWRISK * NEWCONTRACTS
Resize
~POSITION 'declare resize Category
'If current risk is 20% greater than initial risk then
'reduce position size by 10%
IF RISK > TRADEMEM[1] * 1.2 THEN MULTIPLIER = .9
As you can see, this is a classic channel-breakout system that enters and exits on a stop. It is 3-phase, so it can be long, short, or flat. The only twist occurs on the Resize page, where we’ve instructed Mechanica to reduce the number of contracts by 10% when the position’s current risk is 20% greater than the position’s initial risk. Initial risk was saved in TRADEMEM[1] on entry day while processing initial size rules.
With this system, for every day that an instrument is flat we can expect the following orders to be generated:
| n | LE prospective long entry (buy) order |
| n | SE prospective short entry (sell) order |
| n | LX contingent long exit (sell) order |
| n | SX contingent short exit (buy) order |
If, for example, a prospective long entry (LE) stop is hit, then its corresponding exit (sell) stop order will be activated, which in this case is LX.
When this system holds a long or short position, then it will only generate the corresponding exit order.
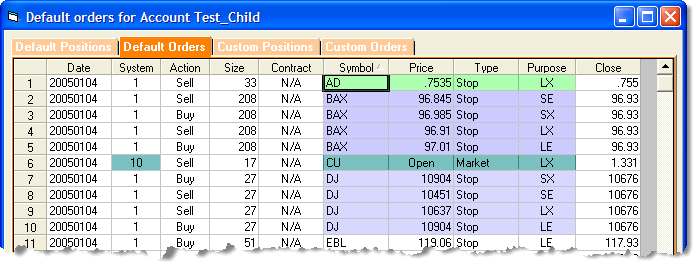
Order Manager will prompt you with the correct order type to enter. Without looking under the Position tab, it is easy to deduce from the example screen below (from a different program than we use in this tutorial), that for System 1, AD is currently long (since only an LX order is present), BAX and DJ are currently flat, and for System 10, CU is currently long, but is to be exited today (LX) with a Market on Open (MOO) order.
As mentioned previously, the SIG and SIZ files for which you wish to generate orders are always run by Order Manager from a batch file, so let’s take a minute to look at the batch file we’re using in this tutorial.
| • | Follow along below, or open the file: |
n ..\Sample Rules\Signal Rules\#8913_Default_OM_Batch.sig
Resources
' This is the batch file that controls order
' generation for #8913_Default_OM.
' specify and process the desired data page
dpage=Pinnacle_Futures
'
' Do the processing;
' process signal rules
..\Sample Rules\Signal Rules\#8913_Default_OM.sig
' process sizing rules
NEXTSTEP
..\Sample Rules\Position Sizing Rules\#8913_Default_OM.siz
| • | The first step is to specify the desired Data Page (from Symbol Manager), using the dpage command, as shown. |
If you are running multiple systems (multiple SIG files) from a single batch file, you may wish to use different Data Pages for subsequent systems. If so, simply use the dpage command to specify the next Data Page to be selected, and place the dpage command immediately following the execution of the previous system’s SIG file.
Even if Data Page(s) other than the one(s) specified in a batch file is/are tagged at the time a batch files is run, Mechanica will ignore them and run the batch file exactly as written. If no Data Page(s) are specified in the batch file then only the one(s) tagged will be processed. Note this is not a good idea because during historical testing you may switch tags and end up later running a batch file using the wrong data! So be sure to specify in your batch file which Data Page it is supposed to use.
|
It's a good idea to setup dedicated Data Pages for use in OM. Why? Because during historical testing you will likely tag and untag different symbols. Later if you try to run orders with a different set of symbols tagged than were tagged for the previous OM session, you will have lots of data marked 'Missing'. The data isn't really missing but for open trades that rely on it, the data for the session could not be found. |

| • | Next, specify the SIG & SIZ files you wish to run (as shown), being careful to place the nextstep command immediately before the last SIZ file to be run. |
|
1. To designate a SIG file as a batch file, simply make sure the word “batch” appears in the filename. 2. If your SIG & SIZ files reside in the Mechanica directory, then it is only necessary to place the filename itself in the batch file, without a complete path, or a relative path, as is used above. You can specify the entire path, including the letter of the drive if you wish. 3. To reiterate; whether you are running one or many SIG & SIZ files from a batch file, make certain that the nextstep keyword appears immediately before the last SIZ file to be run. |
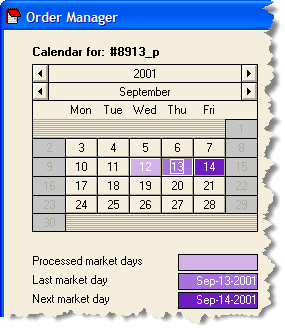
The hypothetical scenario presented in this tutorial is that we are to begin trading a new program on the morning of Sep-14-2001.
|
|
| 16 | Click the Process button; OM will now process the SIG & SIZ files specified in #8913_Default_OM_Batch.sig. |
| • | Once the 1st day of the Parent Account setup is complete, the following dialog will appear: |
|
|
| 19 | Click OK, and another dialog will appear, notifying you that Batch processing is complete. |
| 20 | Click OK. |
| 21 | Before setting up a Child Account, click the Detail button (to the right of the Process button) |
| 22 | Click on the Default Positions tab, then the Default Orders tab. This is what you should see |
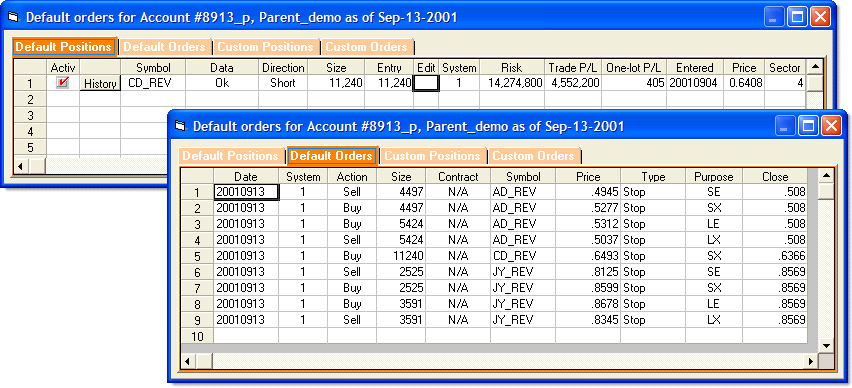
| • | Keep in mind that we’re only working with three instruments: AD, CD, and JY. |
Note in the screen under the Default Positions tab, that the system is currently short CD. Its corresponding exit (SX) appears in the screen under the Default Orders tab.
We can also see under the Default Orders tab that the system is currently flat AD and JY, and their prospective long and short entries, and respective contingent exits, are shown.
The position sizes in the Parent Account are quite large (high resolution), so that the smaller Child Account (which we’ll set up next), can be “ratioed” or “scaled” to them.