| 1 | Go to the Rules Editor and select the Trade Entry page (press F3, or click on the Trade Entry tab). Make sure the cursor is on the first character of the first line. The status bar at the bottom of the Rules Editor should look like this. |

| 2 | Press ENTER. The entire line (and all text below it), will move down one row. |
| 3 | Press UP ARROW, to move the cursor (back up) to the blank line you just created. |
| 4 | Type: “The 28-day moving average should be a good barometer of the short-term trend.” <without the quotations> |
| 5 | Press DOWN ARROW. Mechanica doesn't understand what you've entered, and alerts you by (a) displaying the entire line in red text, and (b) displaying an error message at the bottom right of the editor window: |
Tab: 2 Incomplete Statement Er:97
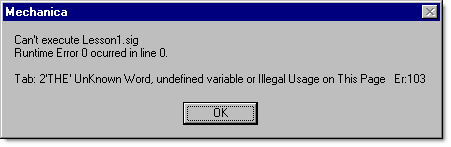
While the message will automatically clear as you continue to work, if you attempt to run the SIG file (don’t do this now), it will generate an error message like the one below:
To enter comments in your program
| 1 | Press UP ARROW. |
| 2 | Type an apostrophe at the beginning of the following sentence: “The 28-day moving average...”, making the apostrophe the first character on the line. |
| 3 | Press DOWN ARROW. |
Notice that (a) the error message in the status bar disappears, and (b) the text on this line turns green. Mechanica has now accepted this line of text and identified it as a comment. In programming jargon, this means that the statement has successfully bypassed the syntax check (which is what you want a comment to do).
Now that you understand how to add comments to a program, go ahead and add the comments after lines 2 and 3, shown below:
![]()
'The 28-day moving average should be a good barometer...
IF CLOSE[1] > COL2[1] THEN BUYOPEN 'long entry signal
IF CLOSE[1] < COL2[1] THEN SELLOPEN 'short entry signal
|
|
To define column values on the Resources Page
In the introduction, we learned that the Resources Page is where you tell Mechanica which data to display in the Grid (discussed in Lesson 3), and which technical indicators and other values your system will use.
| 1 | Go to the Resources Page and start a new line, below our previous code. |
| 2 | Type: COL3 = MIN[LOW,10,0] |
| 3 | This tells Mechanica to put the 10-day low in column 3. |
| 4 | Press ENTER to begin the next line of code. |
| 5 | Type: COL4 = MAX[HIGH,10,0] |
| 6 | As you can guess, this puts the 10-day high in column 4. |
| 7 | Press ENTER to make sure that the statement passes syntax check. |
With these last two lines, you have just entered the code that Mechanica will reference when checking to see whether or not to exit a trade. The code on your Resources page should look like this:
![]()
SYSTEM = 1
COL2 = SMA[CLOSE,28]
COL3 = MIN[LOW,10,0] 'long exit price
COL4 = MAX[HIGH,10,0] 'short exit price
It’s a good idea to go ahead and enter comments after these two new lines of code (as we did, above). As you can see, it’s unnecessary to dedicate an entire line to a comment, although you can; Comments can coexist on the same line as Mechanica Basic statements. Just remember to use an apostrophe. Everything to the right of the apostrophe will be interpreted as a comment.
To set exit stops on the Trade in Progress & Exit Page
| 1 | As discussed in the intro., the code on this page governs Mechanica’s activities while it is in a trade. Besides determining when to exit, it performs such tasks as tracking daily risk calculations. |
| 2 | Go to the Trade in Progress & Exit page of the Rules Editor. This is where we’ll enter the logic for our exit stops. |
| 3 | When you type the following line, be sure and use all lower case letters, and omit the spaces between words, exactly as shown: |
| 4 | Type: sellstop=col3[1];buystop=col4[1] |
| 5 | Press ENTER or DOWN ARROW, and watch what happens; As the syntax checker interprets the line you have just typed, it automatically capitalizes and inserts the correct spacing. The line you just typed should now look like this: |
SELLSTOP = COL3[1] ; BUYSTOP = COL4[1]
You have now entered the logic that tells Mechanica at what prices trades are to be exited.
|
While Mechanica will use these two statements to exit trades, it’s important to keep in mind that both statements reference the COL3 and COL4 values defined earlier, on the Resources page. (Actually, they reference the previous day’s value, due to the one day offset, indicated by the “1” in brackets, above.) |
To enter multiple commands on a single line
Placing two exit statements on the same line, (as we did with the exit stops above), is not something you’re likely to do in practice. It was just a simple example used to introduce the concept.
However, there are times when combining two or more statements on a single line is the best way to get a job done. For instance, you may want to change the value of a memory variable based on the conditional execution of the statement that precedes it. In pseudo-code, you might have a fragment that looks like this:
Example
MEMORY[2] = 0
IF Condition_1 THEN Action ; MEMORY[2] = 1
| • | On the first line in this example, the Memory variable 2 is initialized to zero. |
| • | On the second line, Memory variable 2 is assigned a value of one, only when Condition1 is true (and subsequently executes). |
| • | More explicitly, if Condition1 is true, then Action is taken (the statement executes). Then and only then is Memory variable 2 set to equal one. |
| • | It is important to understand that if Memory variable 2 were placed on its own line following the conditional statement, the outcome would be quite different; In that case, Memory variable 2 would be assigned a value of one every time Mechanica processed the page. |
In a moment we’ll omit the semi-colon and place each exit statement on its own line. But for future reference, keep in mind that you can put more than one Mechanica Basic statement on a line; just remember to use a semi-colon between them.
| 1 | If you haven’t already done so, go ahead and delete the semi-colon that separates the two statements, and place each exit statement on its own line, like this: |
SELLSTOP = COL3[1]
BUYSTOP = COL4[1]
| 2 | Again, it’s a good idea to add the appropriate comments, as we did earlier: |
SELLSTOP = COL3[1] ' price at which long trades are exited
BUYSTOP = COL4[1] ' price at which short trades are covered
![]()
| 3 | From the File menu, choose Save, Signal Rules to save your work, or click the appropriate icon on the Signal toolbar: |
We now have a functional system complete with entries, exits, and commented code. But before running it, let’s review the Mechanica Basic keywords which do the actual buying and selling, and discuss where and how they are used.
|
By this time you should be fairly comfortable navigating Mechanica and manipulating text in the Rules Editor. So from here on, the instructions will become less explicit, with fewer imbedded graphics for common operations that have already been covered. |