In Lessons 1 and 2, we’ll write a partial system to familiarize you with Mechanica’s user environment. The steps we’ll go through here are the same steps you’ll use when you write your own systems.
Let’s start building a system.
![]()
| 1 | Launch Mechanica. |
| 2 | Click on the Resources tab in the Rules Editor, or press F2. |
| 3 | Position your cursor at the beginning of the page if it is not already there. [Note if you have unsaved changes pending from a prior session, Mechanica will prompt you before clearing out your old work area.] |
| 4 | TYPE: SYSTEM = 1 |
When creating a system, the first thing you must do is identify it. You do this by assigning a value to the SYSTEM keyword, as shown in the simple statement above. (This value is later used by the Position Sizing Rules to associate each trade with the system that generated it, which is why Mechanica enforces the assignment of a value to the SYSTEM keyword.) |
The Resources Page is where you tell Mechanica which data to display in the Grid, and which technical indicators and other values your system will use. |
| 5 | PRESS: ENTER to drop down to the next line. |
If your syntax is correct, the line will automatically format, and appear in capital letters. This signals that Mechanica understands order (syntax), of the code you entered.
| • | TYPE: COL2 = SMA[CLOSE,28] |
The statement above tells Mechanica to put the 28-day simple moving average of closing prices in column 2. This value is an indicator that serves as a barometer of trend direction. It will be consulted daily by the statements we are going to add next, on the Trade Entry page.
![]()
| 1 | Press F3, or click on the Trade Entry tab of the Rules Editor. |
| 2 | TYPE: IF CLOSE[1] > COL2[1] THEN BUYOPEN |
This conditional statement is our entry signal for trades in the long direction. It tells Mechanica that, If the closing price yesterday is greater than column 2 yesterday, then buy this instrument (go “long”) on the open today.
Looking (back) at the value which was assigned to column 2 on the Resources page in the previous step, we can see that the statement above is equivalent to: If the close yesterday is greater than the 28-day simple moving average of closing prices yesterday, then buy this instrument on the open today.
| 3 | Press ENTER to drop down to the next line, and to ensure that your syntax is correct. |
| 4 | TYPE: IF CLOSE[1] < COL2[1] THEN SELLOPEN |
This conditional statement is our entry signal for trades in the short direction. It tells Mechanica, If the closing price yesterday is less than column 2 yesterday, then sell this instrument (go “short”) on the open today.
| 5 | Press ENTER to drop down to the next line. |
Your entry rules are now entered.
Remember, the code on the Trade Entry page governs Mechanica’s activities while it is searching for an entry signal, which it does any time your system is not in a trade. Once a trade is entered, Mechanica passes the processing on to the Trade in Progress & Exit page, just like runners in a relay race, passing a baton.
![]()
Though we won’t deal with exits just yet, go ahead and select this tab (click on it, or press F4). It is not necessary to type any code at the moment. But we’ll return to this page later on, and enter our exit code.
![]()
Finally, we’ll add some preliminary (Initial) Position Sizing code.
| 1 | Select the Initial Size tab (click on it, or press F5), and enter this code: |
| 2 | TYPE: STARTUPCASH = 25000000 ...then press ENTER |
| 3 | TYPE: STARTDATE = 19970701 ...then press ENTER |
| 4 | TYPE: NEWCONTRACTS = 1 ...then press ENTER |
These statements tell Mechanica that (a) the starting capital is equal to $USD 25M, and (b) the starting date for the Position Sizing portion of this simulation is July 1st, 1997, and (c) when a new trade is presented, Mechanica is instructed to put on a single contract.
Your Initial (position) Sizing (or “money management”) code has been entered.
We have cycled through four of the five types of pages in the Rules Editor. Select the Resources tab again (click, or press F2), and return to the Resources Page.
|
IF TODAY = MONDAY THEN BUYCLOSE |
To select the data your system will use
Now that we’ve set up an indicator and a couple of entry rules, we need to tell Mechanica which data to use when we test our system.
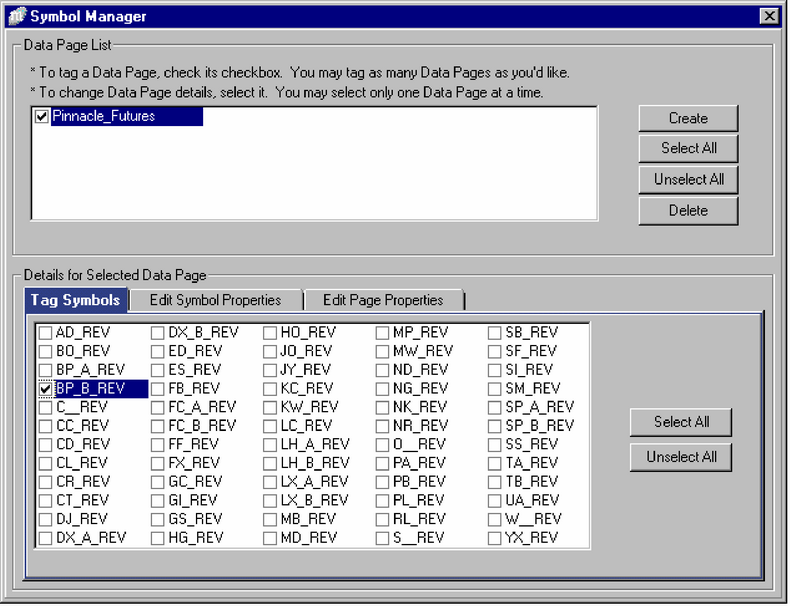
| 1 | Choose Symbol Manager from the Data menu. |
| 2 | Tag (check) the Pinnacle_Futures data page, under the Data Page list. |
| 3 | Under the Tag Symbols tab (bottom half of window), tag BP_B_REV. |
| 4 | Close the Symbol Manager. |
The routine you’ve just completed is a simplified version of the process you’ll complete later on to select data on which to test your system.