Upon install, Mechanica loads and sets up a portfolio of 50 global futures markets (symbols), with a history dating back to 1980, current through the end of 2001. Data is provided courtesy of Pinnacle Data Corp.
|
If during installation you installed the Pinnacle data to a directory other than the default it is likely that you will need to update the path to it so that Mechanica can find it. Choose Symbol Manager under the Data menu. Click on the Edit Page Properties tab then click Browse to navigate to where you installed the data. |
All the details such as tick size, point value, and sector membership have been taken care of for you, and you are free to backtest to your heart’s content.
This lesson guides you through the process that you will follow to set up your own data.
To access Mechanica’s Symbol Manager, choose Symbol Manager under the Data menu.
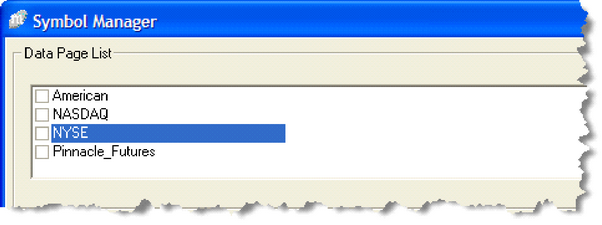
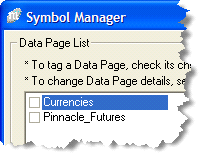
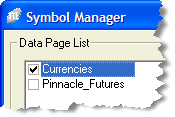
The top section contains the Data Page list. After install, you should see a single Data Page called Pinnacle_Futures.
Each Data Page contains one or more symbols. You can think of a Data Page as a discreet portfolio. Mechanica allows you to create multiple Data Pages, and any combination of Data Pages may be selected for testing.
Note that left-clicking the Data Page label will display its symbols and their properties (you must check the check box to designate a Data Page as active.)
While it is not immediately obvious, one of the beauties of Mechanica’s data management facility is the ability to store all your historical data in a single directory, and then use Data Pages to create multiple portfolios that all point to the same directory. It is no longer necessary to shuffle files all over the place to create various portfolios.
For instance, though not very practical you could have data for 100 different futures markets or 1,000 different stocks, all residing in a single directory. You may choose to create a comprehensive Data Page called “All,” that includes all symbols, and then create separate data pages that group symbols by various subsets, such as by exchange, by sector, by currency denomination, or any other grouping you can think of.
To group stocks by exchange, for instance you might create one Data Page called “NYSE,” another called “NASDAQ,” and a third called “American” etc., as shown .
The three tabs residing in the bottom half of the Symbol Manager (screen shot below) are straight-forward in their descriptions, but the information they store and display is unique for each Data Page. After creating a new Data Page, these tabs are where you will complete the data setup process, so each is discussed in detail, in the following exercises. A summary follows:
| n | Tag Symbols – displays all symbols in the directory specified in the Path To Data field (under Edit Page Properties). |
| n | Edit Symbol Properties – contains symbol name and description, value for a 1 point move, tick size, etc. This is also where you designate sectors, specify forex companion file names, and specify (input) Store[n] variable values. |
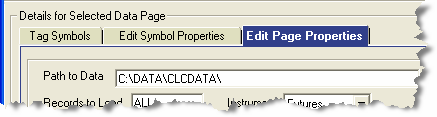
| n | Edit Page Properties – this is the first page you will go to after creating a new Data Page. This is where you specify instrument type (stocks, futures, or mutual funds), commission, the number of records to load, and data file format specifications. |
Creating a Data Page / Edit Page Properties
| 1 | Under the Data menu, choose Symbol Manager. |
| 2 | Click the Create button (highlighted in screen shot below). |
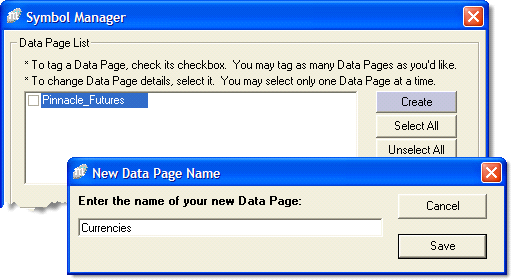
| 3 | When the New Data Page Name dialog box pops up, enter “Currencies” and press Save. |
| 4 | You will then be prompted with the following dialog box. Choose the path shown, and click OK. |
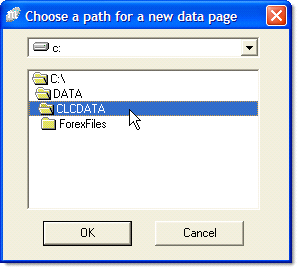
| • | Alternately, you can hit Cancel and enter the path directly into the Path to Data field, under the Edit Page Properties tab. |
| 5 | Under the Records to Load field, leave the default value of “All”. |
| • | Later, you may choose to enter a (positive) integer in the Records to Load field, in order to load less data and speed up processing time. For instance, if you want Mechanica to load only the most recent two years of data, enter the value 500 in this field. (With roughly 250 trading days in a year, 500 equals approximately 2 year’s worth of data).Click the drop-down list box for the Instrument field, and select “Futures.” |
| 6 | Click the drop-down list box for the Instrument field, under the ASCII Data Details section and select “.csv”. |
| 7 | Under the Commissions field, enter $75.00. (For stocks and mutual funds the dollar value entered is per transaction, regardless of the number of shares traded. For futures, the specified value is round-trip, per item.) |
| 8 | Click the drop-down list box for the Instrument field, under the ASCII Data Details section and select “.csv”. |
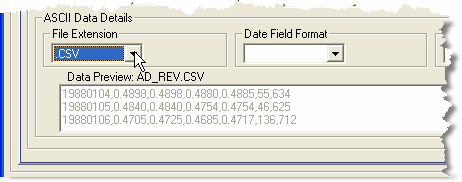
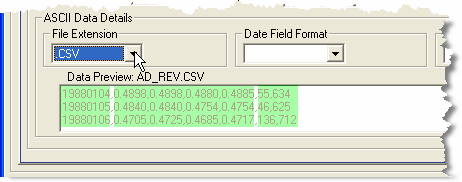
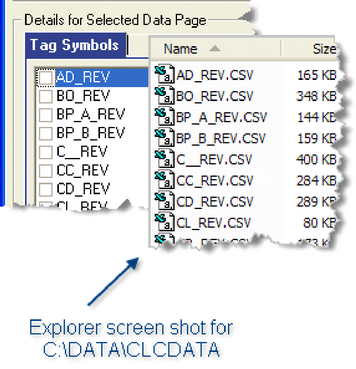
| • | When you select .CSV, note that a view of the first data file in the directory—AD_REV.CSV in this case—is displayed in the Data Preview window. (Data will automatically appear in the Data Preview window once you have selected the correct file extension for your data.) |
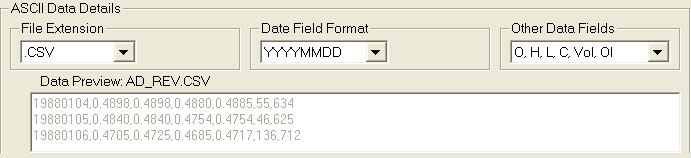
| • | Besides confirming that you have selected the proper file extension for your data file type, the Data Preview window allows you to easily verify the data format. In this case, the data format is Date, Price (O,H,L,C), and Volume, OI (see screen shot above). Now, click the drop-down list box for the Date Field Format field, and select “YYYYMMDD”.To finish this part of the setup, click the drop-down list box for the Other Data Fields …field, and |
| 8 | select “O,H,L,C,Vol, OI”. |
| 9 | Now, click the drop-down list box for the Date Field Format field, and select “YYYYMMDD |
| 10 | To finish this part of the setup, click the drop-down list box for the Other Data Fields …field, and select “O,H,L,C,Vol, OI”. |
| • | The fields under the ASCII Data Details section should now appear as they do in the screen shot below: |
| 11 | Click the Save New button to save these settings. |
| • | Note that immediately afterwards, the Refresh Symbols button appears at the bottom right-hand corner of the Edit Page Properties tab. As you add or remove data files from a directory, you can use the Refresh Symbols button to do just that – to refresh the list of symbols whose data files reside in the directory specified in the Path to Data field under the Edit Page Properties tab. |
|
|
| 1 | Let’s skip over to the Tag Symbols tab (left click on this tab). |
| • | As you can see, the window under the Tag Symbols tab displays all symbols whose data files reside in the target directory. |
|
|
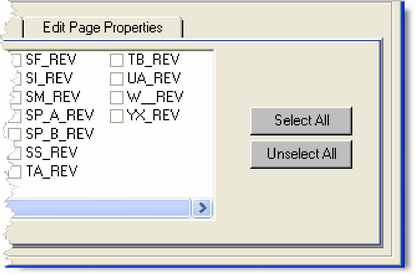
| • | To select or unselect all symbols, click the appropriate button (right, below). |
|
|
| 2 | Now, to finish this part of the setup, select all the currency symbols for the “Currencies” Data Page we created. When you finish, the Tag Symbols window should appear as it does below: |
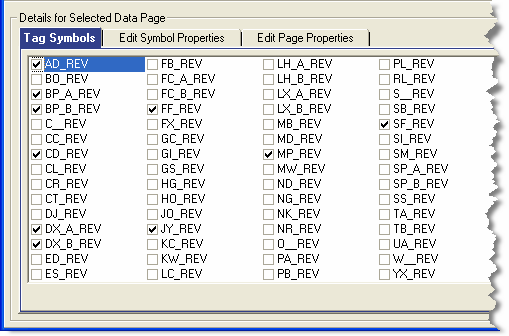
| • | Note that the British Pound and the Dollar Index were each split into two separate data files to accommodate the increase in point value in the late 1980s. Some users prefer this method. |
| • | Others maintain that, if you are trading with a large enough account balance, the change in point value is a relatively inconsequential matter, since in the early years (when the point value of these two instruments is lower), a fixed-fractional position sizing algorithm will automatically compensate for the point value difference by putting on proportionately more contracts, with a small remaining error attributable entirely to contract granularity. Stock traders never have to worry about this issue, since the point value of a stock is always $1.00 (or $100 if you trade in round lots). |
|
|
| 1 | Open the Symbol Manager (from the Data menu). |
| 2 | Click on the Edit Symbol Properties tab. As mentioned earlier, this is where you will specify symbol name and description, value for a 1 point move, tick size, etc. It is also where you will designate sectors, specify forex companion file names, and STORE[n] variable values. |
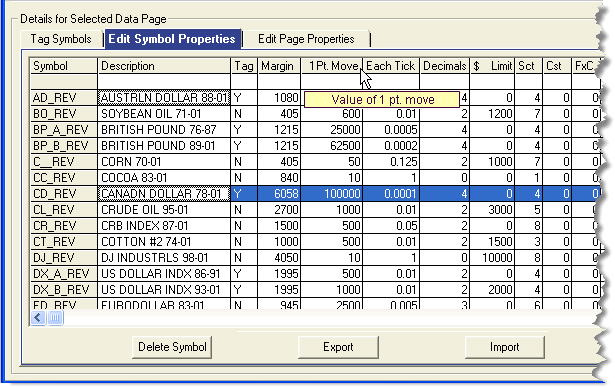
| • | The first thing to notice is that each column heading under the Edit Symbol Properties tab has an associated Tool Tip (the small yellow highlighted box, above), that appears any time you “mouse-over.” |
| • | Click in any field to edit. |
| • | To delete a symbol, click on a symbol name under the Symbol column. This will highlight the entire row, like CD_REV appears, above. Then press the Delete Symbol button to delete. |
|
This deletes the row from the list, but the data file remains intact. |
| • | To select multiple rows: For example, if you want to delete all symbols that start with the letter “C,” first left click C_REV, press the Shift key and hold down, then left click CT_REV. This will select all rows between, and including C_REV and CT_REV. |
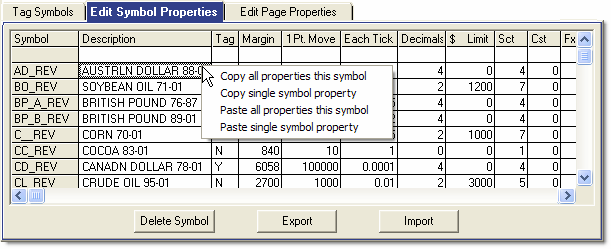
| • | You can easily copy and paste symbol properties. Just right click in any field for the list of options (shown below). They are self-explanatory. |
To import or export Symbol Properties
| • | If you are conducting research with others, the easiest way to duplicate data setups is to simply export your Symbol Properties and email them to your research partner, who can import them into Mechanica on their end. Here’s how: |
| 1 | Select the Pinnacle Futures Data Page at the top part of Symbol Manager, under the Data Page List. (It doesn’t matter whether it’s checked or not.) |
| 2 | Click on the Edit Symbol Properties tab, if it is not already the active tab. |
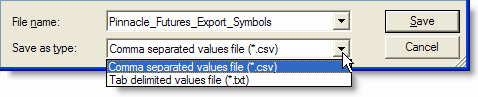
| 3 | Click the Export button located at the bottom of the Edit Symbol Properties tab window frame. |
| 4 | You will be prompted with the Export data to file dialog box. Note that (a) the default file name includes the name of the current Data Page – in this case, Pinnacle_Futures, and (b) by clicking Save as type, you are presented with the option to save as either *.csv, or tab delimited *.txt. Choose the extension that is easiest to import into your spreadsheet application. |
| 5 | Accept the default file name, or overwrite it by entering the filename of your choice, then Save to the same directory where your data is stored. |
| 6 | The process we just outlined ensures that the header structure Mechanica uses is preserved, and that the subsequent import is trouble-free. |
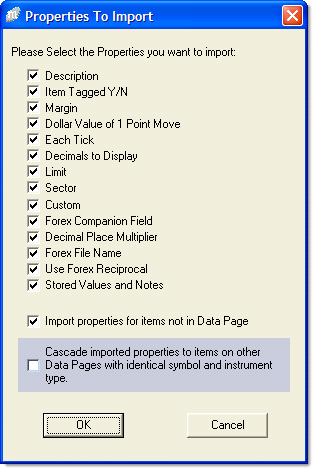
| 7 | Press the Import button located at the bottom of the Edit Symbol Properties tab window frame (screen shot, previous page). You will be prompted with the Open import file dialog box. |
So exercise caution in its use! |
|
Descriptions for Mechanica’s (editable) Symbol Properties are listed below:
| n | Symbol – this column displays the symbols of the instruments whose data files reside in the target data directory. The displayed symbol name is the filename of the data files, minus the file extension. |
| n | Description – this twenty (20) character text field used to fully identify the (sometimes cryptic) symbol name. Example: British Pound 76-88, British Pound 89-01. |
| n | Tag (Y/N) – shows the Tag status of each Symbol. The status changes each time you tag or untag a Symbol under the Tag Symbol (tab) window in the Symbol Manager. |
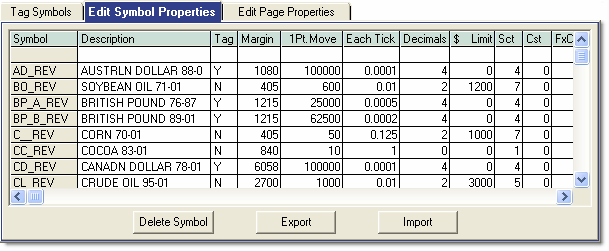
| n | Margin – This field is important if you are using MARGIN, or MARGIN-related keywords in your position sizing and/or resizing operations. (See the Mechanica Basic language reference for more info on this keyword.) |
For futures, the margin requirement (good-faith deposit) is different for each instrument, and may also differ significantly over the life of the market. Futures margin can also differ among FCMs, most of whom use some form of the CME-developed SPAN risk-array algorithm, which awards credits for diversification.
For stocks, margin is the percentage of the purchase price (dictated by the SEC’s Regulation-T) that you must put up to buy or short a stock on margin. (This is a complex topic that is outside the scope of this document.) But keep in mind that, though a different concept than futures margin, margin requirements can also vary among different types of stocks (it is generally tied to volatility), is different for longs than it is for shorts, and can vary by brokerage.
The category-legal keyword MARGIN returns the combined margin (in dollars) carried by all open positions in each set under a specified category.
Since the MARGIN keyword is now assignable on the fly, in your SIG code, you can create volatility-based margin values, if you have the formula to do so.
As mentioned above, most FCMs employ the SPAN risk-array algorithm, which awards credits for diversification. So if you are testing and/or trading futures, the summed margin requirement(s) reported by Mechanica are likely to exceed the margin actually required by an FCM.
It is also worth noting that initial margin and maintenance margin requirements often differ.
Margin amounts for foreign denominated markets should now be specified in the native currency.
| n | 1 Pt. Move – The value of a one (1.0) point move, expressed in the currency denomination of the instrument. The value entered in this field is assigned to the Mechanica Basic keyword POINTVALUE. A one-point (1.0) move may not be possible in certain markets depending upon how price is pointed off, but if it did, this function returns the dollar value the move would represent. This brings market price changes to a common value. |
For a trader in the US, trading only dollar-denominated futures, this is equivalent to the dollar value of a one point (1.0) move. (For US stocks, is $1.00, or $100 if you trade in round lots). If that same trader begins trading the German Bund, then this value should be expressed in the native currency of the instrument, which is the Euro.
In order for Mechanica to calculate nightly P/L, risk, etc., in dollar terms, you must set up a forex conversion CMP[n] file (companion file) for each such foreign currency denominated instrument, and use the Symbol Manager to associate that CMP file with the correct symbol. This is discussed in detail in the next section.
| n | Each Tick – the smallest amount that price can change by, for the particular instrument. |
| n | $ Limit – The dollar value of a limit move. May be of importance for futures traders; has nebulous application for stock traders, since limit moves aren’t dictated by instrument, but through exchange mandated “circuit-breakers” that look at various market averages. Like margin, limit moves are tied to volatility, and can vary over the life of the market. May also differ among FCMs. In Mechanica, this value is used only by Welles Wilder’s ASI (Accumulative Swing Index) indicator. |
| n | Sct – The instrument’s Sector designation. Valid Sectors are 0 – 999. |
| n | Cst – N/A. |
| n | FxC – Forex companion field. Enter “1” here, to tell Mechanica to look in CMP[1] for the conversion value. (If you enter “13” Mechanica will look in CMP[13] for the conversion value.) |
| n | DPMult – Decimal Point Multiplier. To be used only with foreign-denominated instruments that employ a CMP (companion) file for forex conversion. Leave at default setting of zero for instruments denominated in your native currency. |
Instruments denominated in a foreign currency require the use of a CMP[n] file containing forex conversion data, to bring the nightly P/L back into $USD, or whatever your native currency is. (This is discussed in detail, in the next section.)
In order to accommodate forex data which has an unconventional decimal placement, the instrument’s point value is multiplied by the value placed in the DPMult field, effectively allowing you to shift the forex data’s decimal placement to the left or right, as shown in the table below.
DPMult value |
Point Value |
unadjusted |
1,000 |
0 |
1,000 |
0.1 |
100 |
1 |
1,000 |
10
|
10,000 |
| n | ForexFileName – name of the forex companion file. This file Must be located in the target data directory specified for the Data Page (in the Path To Data field, under the Edit Page Properties tab). The forex CMP (companion) file ensures that rate changes in the native currency of non dollar-denominated positions are accurately accounted for (Mechanica adjusts on the close, daily). |
| n | R – Use Forex Reciprocal? Y/N – Reciprocal selection field; Defaults to N. |
When set to N: Forex price = Forex price
When set to Y: Forex price = 1 / Forex price
| n | Store (1-8) – A user-input value that is specific to an instrument. You can have up to eight STORE variables for each instrument, and can assign different variables for each market. In STORE[1], you might specify that slippage equals 4 ticks in the Euro, and 20 ticks in Cotton. Then, in your SIG code, SLIPPAGE=STORE[1]. |
| n | Note (1-8) – Jot notes that pertain to the value of the related Store[n] variable in this text field. |